This tutorial will consist of multiple posts, initially focused on beginners. Both of the first two installments will provide code usable as is, though you may of course choose to customize it further. All of the installments will also assume basic familiarity with open-source WordPress (available via wordpress.org and many web hosts), and will employ WordPress-related terms and concepts – such as WordPress’s sidebar widgets and Visual/WYSIWYG and Text/HTML editing panels – but the code will work on other HTML- and CSS-based platforms. It cannot be used on restrictively template-driven platforms like WordPress.com that do not allow users to edit their site code directly: If you don’t have that kind of access, but want more control over your site, you’ll have to move to an open source platform (which may not be as difficult or expensive as it may sound to the uninitiated).
The Objective
We want a visible appeal to users asking and enabling them to support our site monetarily. We want it to be quick, easy, and familiar, and we want people to feel confident, and for good reason, that their payment information will not be misused. Because we are asking for a donation, we don’t want to get in the way of anyone’s generosity, so we’ll leave it up to our supporters to determine the specific amount they want to offer.
For open source WordPress users in particular, there are many plug-ins that will do the job, and that are easy to set up: You can have a well-designed, more-capable-than-you-probably-need solution up and running well before you have finished the first part of this tutorial, much less the entire thing. That’s one of the benefits of WordPress – the availability for free of thousands of often very high quality plug-ins.
On the other hand, at least as WordPress modification projects go, this one is fairly simple. So, if you want to learn about modifying WordPress, it’s a good place to start. In addition, putting the solution together by yourself and fully understanding it, rather than simply adopting someone else’s plug-in, will give you something more to work with and build on. You’ll also find easily copyable and customizable code for a version of a simple button. Feel free to skip to the end whenever you like, but the point of this tutorial is “how-to” not “quick-fix.”
As for this project in particular, of all of the possible places where bloggers might add a Tip Jar, blogger biography (or “About”) pages and main sidebars are the most common. Since virtually the same code will work for both, that’s what we’ll focus on here. We’ll leave more unusual and complex ideas – advanced styling, fundraising drives, donor walls, paywalling, content-dripping, digital wallets, checkout and post-checkout landing pages, and so on – for later exploration as we work toward full-fledged monetization solutions adaptable for a wide range of sites, from part-time blog to major publishing and e-commerce enterprise.
A Form-Based Paypal Tip Jar
Like the overwhelming majority of the plug-ins that I mentioned at the outset, our solution will depend on Paypal. If you are committed to some other on-line payments processor or credit card gateway, much of the following will be irrelevant to you. Paypal rates as high on the familiarity scale as we are going to find. It also offers reasonable rates for credit card processing. Given WordPress’ international reach, we should also note here at the outset that users in different countries will of course encounter different questions and potential complications, even legal complications as well as practical ones, when it comes to asking for money on the internet. This tutorial will stick with US Dollars (“USD” in the code!) and Paypal options for US users. Non-U.S. users may have to adjust their approach to greatly varying extents, and may find certain options closed to them.
If you have a Paypal Personal account, but want to use the solution I’m going to recommend eventually and use Paypal’s button generator, you will have to upgrade from within Paypal to a Premier or Business account (via Profile). There are no direct fees for the upgrade, and, if you don’t know for sure that you need a Business account, you probably don’t, even if you happen to use Paypal for a small business. You do not however need to upgrade your account in order to add and use the code for the most basic Tip Jar I’ll be focused on in this post.
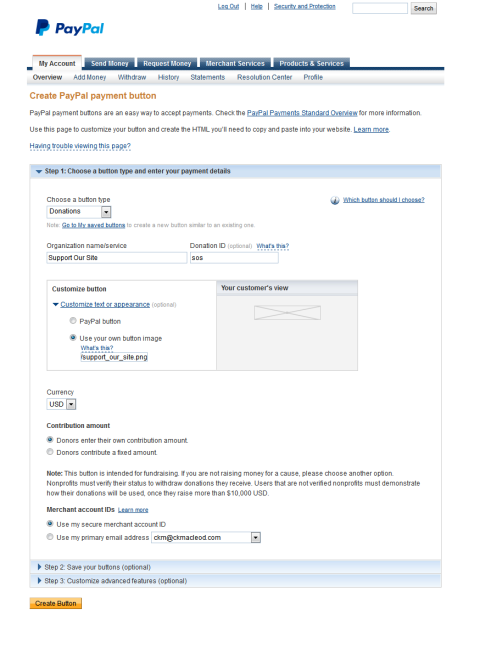
At Paypal, under Merchant Services, one of the featured items is Payment Buttons. You can also find numerous Paypal button code generators elsewhere, via a simple web search, but, since we’ll eventually want to familiarize ourselves with Paypal’s native features, we might as well go to Paypal’s own button generation page.
From the initial menu of choices, we’ll be interested in the “Donation” or “Buy Now” options. Neither will be perfect for our purposes as generated, but we’ll use the “Donate” version in this example, since, if you take it “as is,” without custom imagery or text or other alterations, and you don’t expect to be earning more than $10,000 from cumulative donations anytime soon – or, in the United States, represent an official 501(c)(3) organizations – it will do the trick, and look right to the casual observer.
“Buy Now” may seem at first an inadequate alternative, both because the default text and selection of buttons seem to refer to purchases rather than to contributions, and because it is not immediately obvious that Buy Now button can be used for “no-set-amount” transactions. Our more advanced Tip Jars (beginning with the next post in this series) will, however, involve modification of a “Buy Now” button, since it turns out that we can use it not only for no-set-amount transactions, but for ones in which the donor can fill out the amount before getting to Paypal. Paypal’s Donation buttons are not set up to facilitate the latter.
Basic Tip Jar
Following the simple directions for Paypal button creation, either at Paypal or using some off-Paypal button generator, you can easily create the code for a Donation button.
If and when you generate your own code for different types of buttons, you’ll want to pay close attention to the differences between “hosted” and “non-hosted” buttons (the former created under the “Save Your Buttons at Paypal” tab), between using your Merchant ID or a Paypal payments email address, and between using an encrypted or non-encrypted button (the former are really for high-volume sellers), but you don’t need to worry about that now: Since we’re focusing here on a solution that anyone can adapt directly, we’re using the code for a non-hosted, email-address-enabled, non-encrypted button.
The following code is what Paypal’s own code generator and many off-site generators will give you:
<form action="https://www.paypal.com/cgi-bin/webscr" method="post" target="_top">
<input type="hidden" name="cmd" value="_donations">
<input type="hidden" name="business" value="[YOUR PAYPAL EMAIL ADDRESS]">
<input type="hidden" name="lc" value="US">
<input type="hidden" name="item_name" value="Support Our Site!">
<input type="hidden" name="no_note" value="0">
<input type="hidden" name="currency_code" value="USD">
<input type="hidden" name="bn" value="PP-DonationsBF:btn_donateCC_LG.gif:NonHostedGuest">
<input type="image" src="https://www.paypalobjects.com/en_US/i/btn/btn_donateCC_LG.gif" border="0" name="submit" alt="PayPal - The safer, easier way to pay online!">
<img alt="" border="0" src="https://www.paypalobjects.com/en_US/i/scr/pixel.gif" width="1" height="1">
</form>
If you have a Paypal account – even the most basic Personal account – you can use the above code, substituting your Paypal-enabled email address for [YOUR PAYPAL EMAIL ADDRESS] and your own slogan or other description for Support Our Site!. Pasted into your site’s HTML – for example in a WordPress About Page or Text Widget – the above code will, after a few additional alterations, produce the following:
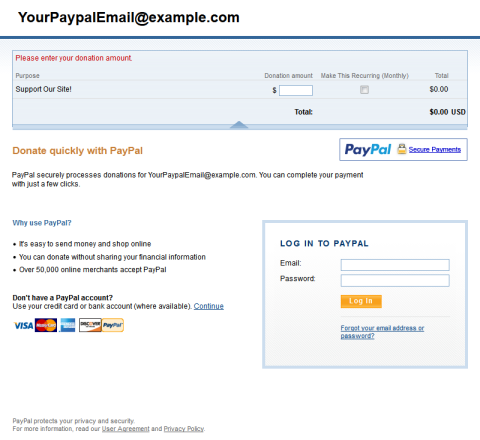
You could add some text before and after the button/image explaining to people why your site deserves their support. For now, go ahead and click on it if you want – it won’t put you in any immediate financial danger. As you will see, after being overwhelmed by your sympathetic pitch, and clicking the button, a user will be taken to a page like the following:
The generic “Buy Now” checkout differs slightly, and checkout aesthetics and operations can be further customized at Paypal, but that’s a subject for some other time. We’ve got other, more urgent matters to attend to first.
Solving Some Formatting Glitches
I emphasized “a few additional alterations” above because, though the code will mostly work fine, you will likely encounter some initial formatting problems after copy-pasting it, whether you get it from a button generator or from my example.
Pasted into the Visual editor, when you’re working on a Post or Page, the code won’t work at all. Pasted into the Text editor, it will produce a bunch of white space due to the way that the WordPress Text editor handles line-breaks (it adds <br> tags for each new line). The first is not a problem, exactly: It’s just a fact of WordPress life. You’ve got to paste most code (with the exception of “shortcode”) into the Text editor, not the Visual editor.
To deal with the second problem, or the real problem, you can either delete the empty line-break spaces in the Visual editor, or delete line breaks (making all of the code run together as though in a single “sentence”) in the Text editor. The result would be jammed together, all on one line, in the Text editor:
<form action="https://www.paypal.com/cgi-bin/webscr" method="post" target="_top"><input type="hidden" name="cmd" value="_donations"><input type="hidden" name="business" value="[YOUR PAYPAL EMAIL ADDRESS]"><input type="hidden" name="lc" value="US"><input type="hidden" name="item_name" value="Support Our Site!"><input type="hidden" name="no_note" value="0"><input type="hidden" name="currency_code" value="USD"><input type="hidden" name="bn" value="PP-DonationsBF:btn_donateCC_LG.gif:NonHostedGuest"><input type="image" src="https://www.paypalobjects.com/en_US/i/btn/btn_donateCC_LG.gif" border="0" name="submit" alt="PayPal - The safer, easier way to pay online!"></form>
There’s nothing wrong with doing that: It’ll even speed up reaction time by a nanosecond or two.
If you look very closely to the jammed-together version of the code, you may notice something else that’s different, or something missing – the line that reads <img alt="" border="0" src="https://www.paypalobjects.com/en_US/i/scr/pixel.gif" width="1" height="1"> in the generated code. I’ve gone ahead and deleted the line because it’s not necessary, and it tends to produce another minor formatting problem: extra empty space below the button both in pages and in widgets. Depending on your theme and placements, and your degree of perfectionism, the results may strike you as somewhere between no-big-deal to horrifying. (It usually horrifies me, so I pluck it out with extreme prejudice.)
The problem is that Paypal’s code contains a 1-pixel by 1-pixel pseudo-image, literally the tiniest of digital dots, that serves a purpose for Paypal (tracking), but serves none I know of for bloggers. Though it’s a microscopic image on its own, it may be assigned margins or padding (and maybe more!) by your theme’s image styles. On the bright side, Paypal describes use of the image as “optional,” so no need to worry or go out of your way to exclude it from your blog’s image styles: You can just delete the last line before </form> , as I already have done for you in the run-on version of the code.
You will also, incidentally, encounter this problem with widget and link code from Amazon and other firms, especially ones that have been in big business on the internet since the turn of the millennium. I’ve been vaporizing these pseudo-images for years, and neither Amazon nor Paypal has ever sent me a cease and desist order. I urge you to do the same, at least until the day they handle the problem from their side.
We’ll have some alternatives that are more easily and fully customizable in the next installment in this tutorial, but for now we’ll stick with the basic, form-based button, with one additional optional alteration and just a little bit of extra formatting…
Replacing the Donate Button
Paypal’s basic button images do not appear to have changed at all in ten years or more, but you can also easily replace a Paypal button image with an image of your own.
It makes no difference in functionality whether you use Paypal’s images or your own. When I was just starting out with this stuff, I wasn’t sure. Though it may seem strange to an experienced user and certainly reads strange to me now, I wondered if there might be some code or other special digital magic hidden in Paypal’s image.
Don’t worry about it. Whether or not you add a link to your own image on the Paypal button creation page, or when pasting the code into your widget or page, there are no invisible strings connecting Paypal’s or any other image to the results. So, hack away!
If you’re handy with a graphic arts program, you can steal the Paypal and credit card logos – or find other versions on-line easily enough – and add them to your own imagery or artwork compositing your own Donate or Contribute or GIVE! or whatever-you-choose button.
One popular theory is that people are more likely to interact with (or donate to) someone who seems real to them, and that a photograph will be more real to them than an abstraction. So, if you buy this line, you could…
- locate or scan or download a nice snapshot-sized portrait of yourself (or maybe your personal avatar if you have and use one – even if it happens to be your dog, cat, child, or political statement);
- add some explanatory text and symbol overlays in Photoshop or GIMP or other image/graphic editor;
- save it as a GIF, JPG, or PNG file;
- upload the result via the WordPress Media uploader or some other site;
- copy the URL; and
- substitute it in the code for
https://www.paypalobjects.com/en_US/i/btn/btn_donateCC_LG.gif.
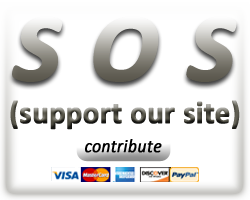
Or you can also steal the sample image-button that I created for this post for your multi-author blog or community site. I’ll even make it easy for you below (but please let me know on the off chance that you do use it – or if you get anything else out of this tutorial!).
The Amazing Grabbable Usable Customizable Support Our Site Button Code, or End of Part 1
We’ll cover some more sophisticated and more easily customized approaches, featuring, ahem, client-side amount specification and more up-to-date CSS3 stylings, in Part 2 of this tutorial. For now, here’s “Support Our Site!” code in grabbable form. I’ve added a couple of CSS selectors to help those with CSS skills in formatting it further, and I’ve cheated with some in-line CSS at the very beginning (after “style” on the first line – if you don’t want it centered and always 250 pixels wide, delete everything from style to 250px/").
<form class="sos_form" style="margin: 0 auto; padding: 0; display: block; width: 250px;" action="https://www.paypal.com/cgi-bin/webscr" method="post" target="_top"><input name="cmd" type="hidden" value="_donations" /> <input name="business" type="hidden" value="[YOUR PAYPAL EMAIL ADDRESS]" /> <input name="lc" type="hidden" value="US" /> <input name="item_name" type="hidden" value="Support Our Site!" /> <input name="no_note" type="hidden" value="0" /> <input name="currency_code" type="hidden" value="USD" /> <input name="bn" type="hidden" value="PP-DonationsBF:btn_donateCC_LG.gif:NonHostedGuest" /> <input class="sos_button_image" title="Support Our Site!" alt="Support Our Site!" name="submit" src="https://ckmacleod.com/wp-content/uploads/2014/07/support_our_site.png" type="image" height="200" width="250" /></form>
…which, prior to any additional formatting, yields this:
Oh, except I made one other change: That button works just fine if you want to tip me. Please be my non-hosted guest!


 ). Go to our


I was wondering if you ever thought of changing the layout of your site?
Its very well written; I love what youve got to say. But maybe you could a little
more in the way of content so people could connect with
it better. Youve got an awful lot of text for only having one or 2 pictures.
Maybe you could space it out better?